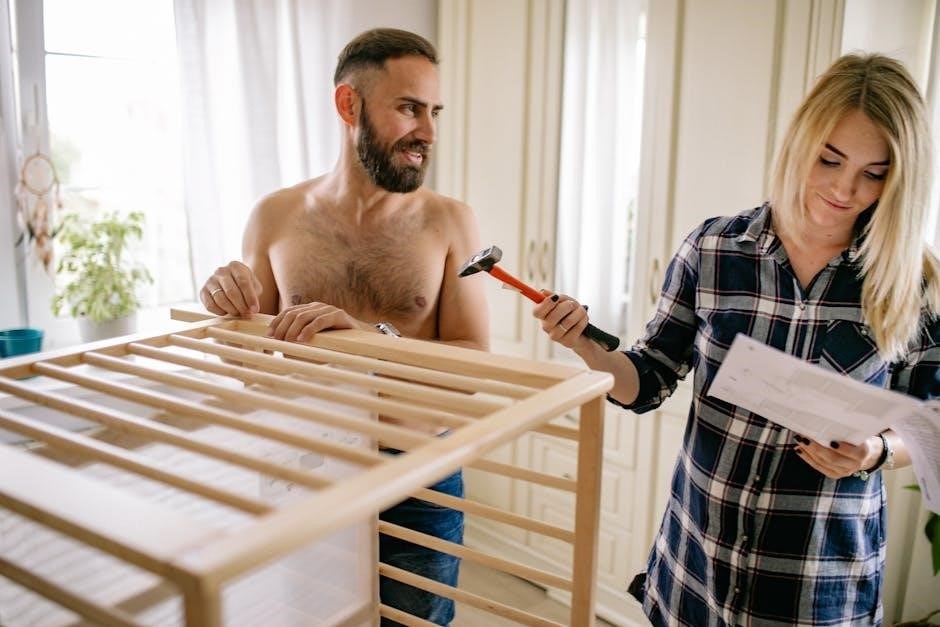
Installing Carlo sofa legs is a straightforward process that enhances both functionality and aesthetics. This guide provides a step-by-step approach to ensure a secure and stable installation process.
With the right tools and preparation, you can achieve professional results. Properly attaching the legs ensures evenness and prevents damage to the sofa or floor, making it a worthwhile DIY project.
Overview of the Process
The Carlo sofa leg installation process involves several key steps, starting with removing the old legs and inspecting the area for damage. Next, locate the pre-drilled holes on the sofa frame, ensuring accurate alignment for the new legs. After attaching the legs securely, tighten all screws and perform final adjustments to ensure stability and evenness. This process is designed to be straightforward, requiring minimal tools and basic DIY skills.
By following the steps carefully, you can successfully install the new legs, enhancing the sofa’s appearance and functionality. Proper alignment and tightening are crucial for long-term stability and preventing wobbling; This project is ideal for homeowners looking to refresh their furniture without professional assistance.
Importance of Proper Installation
Properly installing Carlo sofa legs is essential for ensuring the stability and longevity of your furniture. Incorrect installation can lead to wobbling, unevenness, or even damage to the sofa frame or floor. Securely attached legs prevent the sofa from shifting, providing a safe and comfortable seating experience. Additionally, proper alignment protects the legs from premature wear and tear. This step is crucial for maintaining the aesthetic appeal and structural integrity of your Carlo sofa, ensuring it remains a durable and stylish addition to your home for years to come.

Tools and Materials Needed
The essential tools and materials for a successful Carlo sofa leg installation include a screwdriver, drill, measuring tape, level, wrench, and Allen key. Additional materials like washers and screws may be required for secure attachment.
Essential Tools for the Job

To ensure a smooth and efficient Carlo sofa leg installation, gather the necessary tools in advance. A screwdriver or drill is required for unscrewing and securing the legs. Additionally, a measuring tape or ruler will help measure and align the legs accurately. A pencil can be used to mark the correct positions. For added stability, a level is recommended to ensure evenness. Other essential tools include a wrench or Allen key, depending on the type of screws used. Having a socket wrench with a 13mm socket may also be necessary for certain leg models.
- Screwdriver or drill
- Measuring tape or ruler
- Pencil
- Level
- Wrench or Allen key
- Socket wrench with 13mm socket (if required)
Additional Materials Required
Beyond tools, ensure you have the right materials for a secure and successful Carlo sofa leg installation. Gaskets or washers are often provided with the legs to protect the sofa and ensure a snug fit. If not included, consider purchasing them separately. Wood shims may be needed for leveling on uneven surfaces. Additionally, protective materials like drop cloths or old sheets can safeguard your floor and sofa during the process. A damp cloth for cleaning the area before installation is also recommended to ensure a clean, stable base for the new legs.
- Gaskets or washers
- Wood shims
- Protective coverings (drop cloths or old sheets)
- Damp cloth

Preparing for Installation
Clear the workspace and lay down protective coverings to safeguard the sofa and floor. Ensure the area is clean, flat, and free from debris for a smooth process.
Clearing the Workspace
Begin by moving the sofa to a safe, open area away from walls and furniture. Remove any cushions or accessories to prevent damage. Cover the floor with drop cloths or old sheets to protect it from scratches or debris. Clean the area thoroughly, ensuring no objects obstruct the workspace. This preparation ensures a smooth and efficient installation process for your Carlo sofa legs.
Protecting the Sofa and Floor
Before starting, lay drop cloths or old sheets on the floor to prevent scratches. Place felt pads under the sofa’s edges to avoid damaging the floor when moving it. Cover the sofa itself with a clean, sturdy cloth to protect it from dust or debris. Ensure all surfaces are dry and free of dirt to prevent slipping or damage during the installation process. This step ensures both the sofa and floor remain unharmed while working on the leg installation.

Removing the Old Legs
Start by unscrewing the existing legs using a screwdriver or drill. Turn the sofa upside down for better access. Remove all screws carefully to avoid stripping them.
Unscrewing the Existing Legs
To remove the old legs, start by flipping the sofa onto its side or upside down for easy access. Use a screwdriver or drill to unscrew the legs from the base. Most legs are attached with standard screws, so this should be straightforward. Be careful not to strip the screws or damage the surrounding material. If the screws are stubborn, apply gentle pressure and work slowly to avoid breaking them.
Once the screws are removed, carefully pull the legs away from the sofa. If any fragments remain, use a pair of pliers to remove them. Ensure the area is clean before proceeding to the next step.
Inspecting the Area for Damage
After removing the old legs, inspect the area thoroughly for any damage or debris. Check for leftover screws, stripped holes, or cracks in the sofa frame. Ensure the surface is clean and even, as any damage could affect the stability of the new legs.
If you find any damage, address it before proceeding. Fill stripped holes with wood filler or repair cracks to create a stable base for the new legs. This step ensures a secure and even installation, preventing future wobbling or instability.

Locating the Pre-Drilled Holes
To begin, carefully flip the sofa upside down and place it on a soft, protected surface. Inspect the underside of the frame, focusing on the corners where the pre-drilled holes are typically located. These holes are specifically designed for attaching the legs and are usually marked or slightly indented for easy identification.
Use a flashlight to illuminate the area if necessary, and gently feel around the corners with your fingers to confirm the presence of the holes. Ensure each leg aligns perfectly with its corresponding hole to maintain balance and stability. If unsure, refer to the provided instructions or diagrams for precise measurements and placement guidelines.
Once the holes are identified, clean the area around them to remove any debris or old adhesive. This step ensures a secure fit and proper installation of the new legs.
Identifying the Correct Positions
Begin by flipping the sofa onto its back and inspecting the underside of the frame. Locate the pre-drilled holes at each corner, designed specifically for leg attachment. Use a flashlight to illuminate the area if needed. Refer to the manufacturer’s instructions or diagrams for precise measurements and placement guidelines.
Measure the distance between the holes to ensure even spacing. Align each leg with its corresponding hole, ensuring they fit snugly without forcing. Double-check the alignment to avoid misplacement, which could affect stability. Once aligned, proceed to secure the legs firmly in place for a balanced and even installation.
Ensuring Alignment Accuracy
To ensure precise alignment, use a level tool to verify that the sofa frame is even and the pre-drilled holes are correctly positioned. Double-check the measurements against the manufacturer’s guidelines to confirm accuracy. Mark the exact spots where the legs will be attached using a pencil for clear visibility.
Once aligned, use clamps to temporarily hold the legs in place. This prevents shifting during installation. Double-check the alignment before drilling or screwing to avoid costly mistakes. Proper alignment ensures stability and prevents unevenness, making the sofa safe and visually appealing. Accuracy is key for a professional finish.

Attaching the New Legs
Align the new legs precisely with the pre-drilled holes using a level to ensure evenness; Double-check measurements and marks for accuracy. Clamp the legs temporarily to maintain position during installation, ensuring they do not shift. Verify alignment one last time before securing to avoid misplacement. Proper alignment guarantees stability and prevents unevenness, ensuring the sofa remains level and visually appealing. Accuracy in this step is crucial for a successful and professional-looking installation.
Use a pencil to mark the holes clearly, and ensure the legs fit snugly without forcing. This step ensures a secure and balanced fit, enhancing both functionality and aesthetics.
Step-by-Step Attachment Process
Begin by positioning the new legs over the pre-drilled holes, ensuring they align perfectly. Use a level to verify evenness. Secure each leg with screws, tightening firmly but avoiding overtightening. Repeat for all legs. Finally, double-check stability and alignment to ensure a balanced and sturdy installation.
Securing the Legs Properly
Once the legs are aligned, insert screws into the pre-drilled holes and tighten them firmly using a screwdriver or drill; Ensure each leg is evenly secured to maintain balance. Avoid overtightening, as this may damage the sofa frame. Double-check that all screws are tightly fastened and the legs feel stable. Finally, inspect the legs to confirm they are evenly spaced and the sofa sits level on the floor for optimal stability and appearance.

Tightening and Final Adjustments
Tighten all screws firmly, ensuring legs are secure. Check for evenness using a level and adjust as needed. Final adjustments ensure stability and proper alignment.
Ensuring Stability
After attaching the legs, use a level to verify the sofa is even. Ensure all legs make firm contact with the floor. If necessary, adjust the legs slightly for balance. Tighten all screws again to secure the legs in their final positions. Double-check stability by gently rocking the sofa side to side and front to back. A stable base prevents wobbling and ensures the sofa remains steady, providing a comfortable seating experience. Proper alignment and even distribution of weight are key to long-term durability.
Checking for Evenness
Once the legs are securely attached, place a level on the sofa’s frame to ensure it sits evenly. Check all four corners to confirm the legs are in full contact with the floor; If the surface isn’t level, some legs may not touch the floor, causing instability. Use shims or adjust the legs slightly to achieve balance. Ensure the sofa doesn’t wobble by gently pressing down on each side. Proper evenness guarantees comfort and prevents uneven wear on the legs or frame over time.
Completing the Carlo sofa leg installation ensures a stable, even, and visually appealing result. Regular checks and maintenance will keep your sofa in excellent condition and prevent future issues.
Final Checks and Maintenance Tips
After installing the Carlo sofa legs, inspect each leg for stability and evenness. Tighten any loose screws and ensure the sofa is balanced. Regularly check for wear and tear, replacing any damaged parts promptly. To maintain the legs’ appearance, clean them with a soft cloth and avoid harsh chemicals. Additionally, consider placing felt pads on the bottom of the legs to protect the floor from scratches. Proper care will extend the lifespan of your sofa and its legs, ensuring long-lasting durability and aesthetic appeal.