Leviton Switch Instructions: A Comprehensive Guide
Navigating the world of electrical work requires precision. This guide provides detailed instructions for installing and troubleshooting Leviton switches, covering everything from basic wiring to smart features.
Understanding Leviton Switches
Leviton switches are ubiquitous in modern electrical systems, known for their reliability and broad range of functionalities. They control the flow of electricity to lights, appliances, and other devices, forming a crucial component of any home or building’s infrastructure. Understanding their core principles is paramount before undertaking any installation or repair work.
Historically, switches were simple on/off mechanisms. However, Leviton has expanded beyond this, offering single-pole, three-way, and dimmer switches, alongside innovative smart switch options. Single-pole switches control a light from one location, while three-way switches allow control from two locations – ideal for hallways or staircases. Dimmer switches provide adjustable lighting levels, enhancing ambiance and energy efficiency.
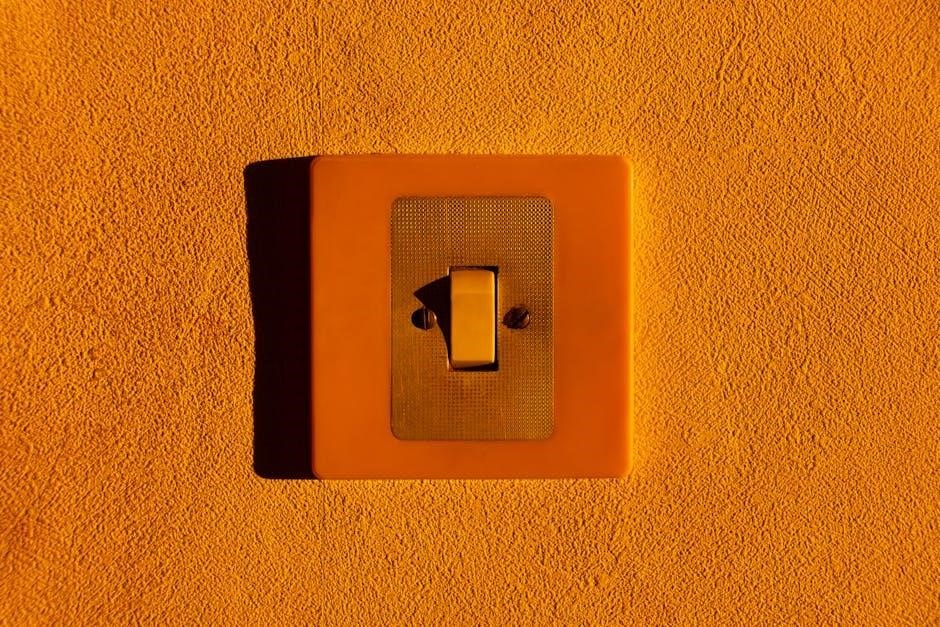
Leviton’s Decora style, characterized by its sleek, rectangular appearance, has become a standard in contemporary design. These switches aren’t merely functional; they contribute to the aesthetic appeal of a room. Furthermore, Leviton prioritizes safety, incorporating features designed to prevent electrical hazards when installed correctly. Familiarizing yourself with these features and the underlying electrical concepts is essential for a successful and safe outcome.
Types of Leviton Switches
Leviton offers a diverse portfolio of switches catering to various needs and preferences. Single-pole switches are the most basic, controlling a fixture from a single location – perfect for bedrooms or individual rooms. Three-way switches, conversely, enable control from two points, commonly found in hallways or stairwells, enhancing convenience.
Dimmer switches represent a step up, allowing adjustable light intensity, creating ambiance and saving energy. These come in various technologies, including incandescent, LED, and CFL compatibility. Smart switches integrate with home automation systems, enabling remote control via smartphones or voice assistants, adding a layer of modern convenience.

Beyond these core types, Leviton provides specialized switches like motion sensors, timer switches, and scene-setting switches. The Decora line encompasses many of these, offering a consistent aesthetic; Understanding the specific requirements of your lighting setup is crucial when selecting the appropriate switch type. Consider factors like bulb type, desired control method, and integration with existing smart home devices to make an informed decision.
Single-Pole Switch Wiring
Wiring a single-pole switch is a fundamental electrical task. First, always disconnect power at the breaker box before commencing any work. Identify the hot (usually black), neutral (white), and ground (green or bare) wires. The hot wire carries the power, the neutral returns it, and the ground provides a safety path.
Connect the hot wire to the dark-colored screw terminal on the switch. The neutral wire connects directly to the fixture, bypassing the switch. The ground wire must be securely connected to the green grounding screw on the switch and the electrical box.
Carefully tuck the wires into the electrical box, ensuring no bare wires are exposed. Mount the switch securely and attach the faceplate. Restore power at the breaker and test the switch. If it doesn’t function, immediately disconnect power and re-check all connections. Proper wiring ensures safe and reliable operation. Remember, if unsure, consult a qualified electrician.
Three-Way Switch Wiring
Three-way switches allow control of a light fixture from two locations. This requires a slightly more complex wiring setup than a single-pole switch. Begin by disconnecting power at the breaker. Identify the common terminal (usually darker in color) on each switch, along with the traveler terminals.
Connect the power source’s hot wire to the common terminal of the first switch. The two traveler wires connect the traveler terminals of both switches. The light fixture’s hot wire connects to the common terminal of the second switch. Neutral wires are connected directly to the fixture, and ground wires are connected to the grounding screws on both switches and the box.
Carefully arrange wires within the boxes, ensuring secure connections and no exposed conductors. Mount the switches and faceplates. Restore power and test the functionality from both switch locations. If issues arise, immediately disconnect power and verify all connections. Correct three-way wiring is crucial for proper operation and safety; consult an electrician if needed.
Dimmer Switch Installation
Installing a Leviton dimmer switch enhances ambiance and saves energy. First, shut off power at the circuit breaker. Remove the existing switch and identify the line (hot), load, neutral, and ground wires. Not all dimmers require a neutral wire, so check the dimmer’s specifications.
Connect the line wire to the corresponding terminal on the dimmer. The load wire connects to the load terminal, and the neutral wire (if required) connects to the neutral terminal. Securely attach the ground wire to the grounding screw. Ensure all connections are tight and no bare wires are exposed.
Carefully tuck the wires into the electrical box and mount the dimmer switch. Attach the faceplate. Restore power at the breaker and test the dimmer’s functionality. Some dimmers may require a specific type of bulb (LED or incandescent) for optimal performance. If flickering occurs, verify bulb compatibility or consult the dimmer’s documentation.
Smart Switch Setup
Leviton smart switches offer remote control and automation. Begin by installing the switch physically, following standard wiring procedures – always disconnect power first! Download the My Leviton app on your smartphone or tablet. Create an account or log in if you already have one.
Follow the in-app instructions to add your smart switch. This typically involves putting the switch into pairing mode (often by holding a button) and connecting it to your home’s Wi-Fi network. Ensure your Wi-Fi network is 2.4GHz, as many smart devices don’t support 5GHz.
Once connected, you can control the switch remotely, set schedules, and integrate it with other smart home platforms like Amazon Alexa or Google Assistant. Explore the app’s features to customize settings and create scenes. Regularly check for firmware updates to maintain optimal performance and security. Troubleshooting often involves resetting the switch or re-connecting to Wi-Fi.
Decora Switch Styles
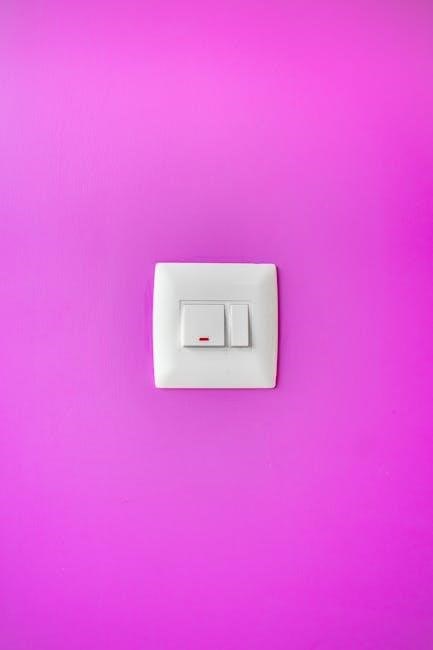
Leviton’s Decora line revolutionized switch aesthetics. Departing from traditional rectangular plates, Decora switches feature a wider, contemporary style that blends seamlessly with modern interiors. They are available in a vast array of colors and finishes – white, ivory, black, gray, and even metallic options – to complement any décor.
Beyond color, Decora styles include options for single-pole, three-way, and dimmer switches. You can find Decora devices with integrated USB ports for convenient charging, or combination switches that control multiple functions. The Decora rocker switches offer a sleek, minimalist look and quiet operation.
Leviton also offers Decora Plus, which provides enhanced features like tamper-resistant outlets and automatic dimming based on ambient light. When choosing Decora styles, consider the functionality needed and the desired aesthetic. Matching the style throughout your home creates a cohesive and polished look.
Troubleshooting Common Issues
Even with careful installation, issues can arise. A common problem is a switch that doesn’t turn on the light – first, check the breaker. If the breaker is fine, verify all wire connections are secure within the switch box. Loose wires are a frequent culprit.
Another issue is a flickering light, often indicating a loose neutral wire or a faulty dimmer switch. For dimmer switches, ensure the bulb is compatible; LEDs and CFLs require specific dimmers. A buzzing sound can also point to dimmer incompatibility or a loose connection.
If a three-way switch isn’t working correctly, double-check the traveler wires. These wires connect the two three-way switches and must be correctly identified. Always turn off the power before troubleshooting. If you’re uncomfortable, consult a qualified electrician. Remember safety first!
Safety Precautions
Working with electricity is inherently dangerous. Prioritize safety above all else. Always turn off the power at the circuit breaker before beginning any electrical work. Verify the power is off using a non-contact voltage tester – never assume. This is the most crucial step to prevent electrical shock.
Wear appropriate safety gear, including insulated gloves and safety glasses. Avoid working in damp or wet conditions, as water significantly increases the risk of electrocution. If you are unsure about any aspect of the installation, consult a qualified electrician. Do not attempt repairs beyond your skill level.
Proper grounding is essential for safety. Ensure the switch is properly grounded to prevent electrical faults and shocks. Never bypass grounding wires. Carefully inspect all wiring for damage before use. If damaged wiring is found, replace it immediately. Remember, electrical safety is non-negotiable.
Tools Required for Installation
Successful Leviton switch installation demands the right tools. A non-contact voltage tester is paramount for confirming power is off before you begin. You’ll need insulated screwdrivers – both flathead and Phillips head – to safely manipulate screws without risk of shock. Wire strippers are essential for cleanly removing insulation from wires, ensuring solid connections.
A pair of pliers (needle-nose are particularly useful) will help with bending and manipulating wires within the electrical box. Electrical tape is needed for insulating connections and securing wires. A level ensures the switch is mounted straight, providing a professional finish. Don’t forget a flashlight or headlamp for illuminating dark work areas.
For more complex installations, a multimeter can be invaluable for testing voltage and continuity. A utility knife may be needed for minor wire adjustments. Finally, having a pencil and paper for labeling wires before disconnecting them is highly recommended to avoid confusion during reassembly.

Wiring Diagrams Explained
Understanding wiring diagrams is crucial for safe and correct Leviton switch installation. Diagrams typically use color-coding: black for hot wires (carrying power), white for neutral wires (returning power), and green or bare copper for ground wires (safety). A single-pole switch diagram shows the hot wire connected to the switch, and then to the light fixture.
Three-way switch diagrams are more complex, involving a “traveler” wire connecting two switches. These diagrams illustrate how interrupting the circuit at either switch controls the light. Dimmer switch diagrams show the connection of the load wire (to the light) and often require a neutral wire connection.
Always verify the diagram matches your specific switch model. Pay close attention to wire connections and terminal markings. Incorrect wiring can cause shorts, fires, or damage to the switch and connected devices. If unsure, consult a qualified electrician. Diagrams often include notes about grounding requirements – always prioritize grounding for safety.
Identifying Switch Components
Familiarizing yourself with Leviton switch components is the first step to successful installation. Most switches feature a yoke (the mounting bracket), a body containing the electrical mechanism, and a toggle or paddle for operation. Terminals are screw-down connections for wires – these are typically color-coded.
Single-pole switches have two terminals, plus a ground screw. Three-way switches have three terminals plus ground, including common and traveler terminals. Dimmer switches often have additional terminals for load and neutral connections, and sometimes a wire for connecting to a fan speed control.
Decora-style switches feature a wider, rectangular paddle. Look for markings on the switch body indicating voltage and amperage ratings; Identifying these components ensures you select the correct switch for your application and connect the wires appropriately. Always inspect the switch for any visible damage before installation.
Replacing an Existing Switch
Replacing a switch is often straightforward, but safety is paramount. Begin by turning off the power at the circuit breaker controlling the switch. Verify the power is off using a non-contact voltage tester. Carefully remove the existing switch plate and unscrew the switch from the electrical box.
Before disconnecting wires, take a photograph of the existing wiring configuration for reference. Loosen the terminal screws and detach the wires, noting their positions. Connect the wires to the new Leviton switch, matching the original configuration – typically black to hot, white to neutral (if applicable), and bare copper or green to ground.
Securely tighten all terminal screws. Gently push the switch back into the electrical box and fasten it with screws. Reattach the switch plate. Restore power at the breaker and test the switch’s functionality. If it doesn’t work, double-check your wiring against the photograph and consult a qualified electrician.
Understanding Electrical Codes
Electrical work is heavily regulated for safety. Familiarize yourself with local electrical codes before beginning any Leviton switch installation. The National Electrical Code (NEC) provides guidelines, but local amendments often apply. These codes dictate wiring methods, box fill capacity, and grounding requirements.
Permits may be required for electrical work, especially for extensive renovations or new installations. Ignoring codes can lead to fines, insurance issues, and, most importantly, safety hazards. Ensure the electrical box is properly sized for the number of wires and devices it contains.
Grounding is crucial for preventing electrical shock. All Leviton switches must be properly grounded. Use appropriate wire connectors and ensure all connections are secure. If you are unsure about any aspect of the electrical code, consult a qualified electrician. Adhering to these standards protects your home and family.
Leviton Support and Resources
Leviton offers extensive support for its products. Their official website (www.leviton.com) is a primary resource, featuring detailed product specifications, installation guides, and troubleshooting tips. You can find downloadable manuals for specific switch models, including wiring diagrams and compatibility information.
A comprehensive FAQ section addresses common questions about Leviton switches, covering everything from wiring configurations to smart home integration. Leviton also provides a customer service hotline where you can speak directly with a technical support representative.
Online forums and communities dedicated to home electrical work can offer valuable peer-to-peer support. YouTube channels often feature instructional videos demonstrating Leviton switch installation and troubleshooting. Remember to always prioritize safety and consult a qualified electrician if you encounter complex issues or are unsure about any aspect of the installation process. Leviton’s commitment extends beyond sales to ensure user success.
Advanced Features & Compatibility
Leviton switches increasingly integrate with smart home ecosystems. Many models are compatible with popular platforms like Amazon Alexa, Google Assistant, and Apple HomeKit, enabling voice control and automation. Dimmer switches often feature adjustable fade rates and preset lighting scenes for customized ambiance.
Decora Smart Wi-Fi switches offer remote control via the My Leviton app, allowing you to manage lighting from anywhere with an internet connection. Some switches include energy monitoring capabilities, providing insights into electricity usage. Compatibility with existing wiring is a key consideration; ensure the switch is suitable for your home’s electrical system.
Advanced features like scene control and scheduling enhance convenience and energy efficiency. Leviton also offers switches designed for specific applications, such as fan control or occupancy sensing. Always check the product specifications to confirm compatibility with your desired smart home devices and wiring configuration before purchasing and installing.