
Welcome to the AuKing Mini Projector Manual! This guide provides a comprehensive overview of setup‚ features‚ and troubleshooting to help you achieve optimal performance effortlessly.
1.1 Understanding the Purpose of the Manual
This manual is designed to help users understand and operate the AuKing Mini Projector effectively. It provides detailed instructions for setup‚ connectivity‚ and troubleshooting‚ ensuring optimal performance. Whether you’re a novice or experienced user‚ this guide covers essential information to enhance your viewing experience. By following the manual‚ you’ll learn how to utilize all features‚ resolve common issues‚ and maintain the projector for long-lasting use.
1.2 Overview of the AuKing Mini Projector Features
The AuKing Mini Projector offers a portable home theater experience with Full HD 1080p resolution‚ a 2000:1 contrast ratio‚ and built-in stereo speakers for immersive sound. It supports HDMI‚ USB‚ and VGA connections and features a long-lasting LED lamp with 55‚000 hours of life. The projector is versatile‚ suitable for both indoor and outdoor use‚ making it perfect for movies‚ gaming‚ and presentations. Its compact design ensures easy transport and setup anywhere.
Specifications and Features of the AuKing Mini Projector
This section details the technical specifications and features of the AuKing Mini Projector‚ including resolution‚ brightness‚ connectivity options‚ and built-in speakers‚ ensuring optimal performance.
2.1 Key Technical Specifications
The AuKing Mini Projector features a high-resolution 1080P display with a 2000:1 contrast ratio‚ offering sharp visuals. Boasting 55‚000 hours of LED lamp life‚ it ensures durability. Its compact design supports projection sizes from 32 to 170 inches‚ providing flexibility for various settings. Equipped with HDMI‚ USB‚ and VGA ports‚ it connects seamlessly to devices like smartphones‚ laptops‚ and gaming consoles. Built-in stereo speakers enhance audio quality‚ making it ideal for home theaters or outdoor use.
2.2 Built-In Stereo Speakers and Projection Display Size
The AuKing Mini Projector features built-in stereo speakers‚ delivering high-quality audio for an immersive experience. Its projection display size ranges from 32 to 170 inches‚ ensuring flexibility for various settings. The speakers provide clear and balanced sound‚ enhancing movies‚ music‚ and games. The adjustable display size allows you to customize the viewing experience‚ making it ideal for both small rooms and outdoor setups. This combination of audio and visual excellence makes it perfect for home theaters and portable use.
Setting Up the AuKing Mini Projector
Setting up the AuKing Mini Projector is straightforward. Unbox‚ assemble‚ and adjust the focus wheel for a clear image. Ensure a smooth projection surface for optimal clarity.
3.1 Unboxing and Assembly
Carefully unbox the AuKing Mini Projector and ensure all components‚ including the projector‚ power cord‚ HDMI cable‚ remote control‚ and user manual‚ are included. Begin by plugging in the power cord and familiarizing yourself with the device. No complex assembly is required; simply connect the cables as indicated. The remote control is pre-synced‚ allowing immediate navigation. Prepare your space for a seamless setup experience.
3.2 Adjusting the Focus Wheel for Clear Image
Locate the focus wheel‚ typically found on the top or side of the projector. Project an image and slowly turn the wheel until the picture appears sharp and clear. Ensure the projection surface is smooth and evenly lit for optimal clarity. Fine-tune the focus patiently‚ as precise adjustments are key to achieving a crisp display. For best results‚ clean the lens regularly to avoid image distortion.
3.3 Ensuring a Smooth Projection Surface
For optimal image quality‚ ensure the projection surface is smooth and even. Use a dedicated screen or a clean‚ flat wall. Avoid wrinkled or uneven surfaces‚ as they can distort the image. If using a screen‚ secure it tightly to prevent any movement. Ensure the surface is free from obstructions and evenly lit. For best results‚ avoid projecting onto textured surfaces like paper or canvas. A smooth surface enhances focus and clarity‚ delivering a sharp and immersive viewing experience.
Connecting Devices to the Projector
Connecting devices to the AuKing Mini Projector is straightforward. Use HDMI‚ USB‚ or VGA ports for quick setup. Compatible with smartphones‚ laptops‚ and gaming consoles for versatile use.
4.1 Connecting via HDMI
To connect a device via HDMI‚ locate the HDMI port on the AuKing Mini Projector. Insert one end of the HDMI cable into the projector and the other into your device (e.g.‚ laptop‚ Blu-ray player‚ or gaming console). Ensure the device is turned on and the projector is set to the correct HDMI input channel. For smartphones‚ use an HDMI adapter to establish a secure connection. This method provides high-quality audio and video transmission for an enhanced viewing experience.
4.2 Connecting via USB and VGA
To connect via USB‚ insert a USB drive into the projector’s USB port for direct media playback. For VGA connections‚ use a VGA cable to link the projector to devices like laptops or PCs. Ensure the projector is set to the VGA input mode. This method is ideal for older devices without HDMI compatibility‚ offering a reliable way to display content. Always power on the device and projector before connecting for seamless functionality.
4.3 Connecting to Smartphones and Other Devices
To connect your smartphone‚ use an HDMI adapter compatible with your phone’s port (e.g.‚ USB-C or MHL). Plug the adapter into the projector’s HDMI port. For wireless connections‚ download the Eshare app‚ ensuring both devices are on the same Wi-Fi network. The projector also supports AirPlay and Miracast for direct wireless streaming. For other devices like laptops‚ use HDMI for the best quality or VGA for compatibility. Ensure the projector is powered on and set to the correct input mode.
Using the Remote Control
The remote control lets you power the projector on/off‚ adjust volume‚ and navigate menus. Use directional buttons to scroll and select settings or inputs easily.
5.1 Navigating the Menu
Press the “Menu” button on the remote to access settings. Use the directional buttons to navigate up‚ down‚ left‚ and right. Select desired options with the “OK” button. Adjust brightness‚ contrast‚ and sound settings easily. Access input sources‚ display settings‚ and advanced features. The menu is user-friendly‚ allowing quick customization for optimal viewing experiences. Ensure the remote is pointed directly at the projector for responsive control.
5.2 Adjusting Settings with the Remote
Use the remote to easily adjust settings like brightness‚ contrast‚ and volume. Press the directional buttons to navigate through options. The “OK” button confirms selections. Adjust focus with the remote for sharp images. Access preset modes for different viewing scenarios. Mute or adjust sound levels with dedicated buttons. Customize settings to enhance your viewing experience. Ensure the remote has clear line-of-sight to the projector for smooth operation.

Image and Sound Settings
Optimize your viewing experience by adjusting brightness‚ contrast‚ and sharpness for crystal-clear visuals. Fine-tune sound settings to enhance audio quality‚ ensuring balanced and immersive entertainment.
6.1 Adjusting Brightness and Contrast
To enhance image quality‚ access the menu using the remote and navigate to Image Settings. Adjust the Brightness slider to optimize visibility based on ambient light. Fine-tune the Contrast to balance dark and light areas for clearer visuals. Ensure the Sharpness is set appropriately to avoid over-sharpening. Save your settings to maintain the preferred display. Proper adjustments will prolong the projector’s lamp life and ensure vivid‚ lifelike imagery for an immersive viewing experience.
6.2 Fine-Tuning Sound Settings
For an immersive experience‚ use the remote to access the Sound Settings menu. Adjust the Volume using the remote’s volume buttons or via the on-screen controls. Customize the Equalizer to enhance bass‚ treble‚ or balance frequencies for clear dialogue and rich sound. Enable features like Dynamic Sound or Night Mode to optimize audio for movies‚ music‚ or late-night viewing. Save your preferences to maintain the perfect auditory balance for all content.
Troubleshooting Common Issues
Resolve issues like connectivity problems by restarting devices‚ checking cables‚ and ensuring proper connections. Address image or sound problems by recalibrating settings or updating firmware.
7.1 No Sound or Low Volume
If experiencing no sound or low volume‚ check the HDMI connection and ensure it’s secure. Verify the audio settings on both the projector and connected device. Ensure the volume is not muted or set to minimum levels. If using external speakers‚ confirm they are properly connected. Restart the projector to resolve any software glitches. Adjusting the built-in stereo speakers’ settings via the remote may also restore sound quality effectively.
7.2 Blurry or Low Brightness Image
A blurry image can be resolved by adjusting the focus wheel on the projector. Ensure the projection surface is smooth and clean. If brightness is low‚ check the lamp’s lifespan and ensure the bulb is clean. Verify the room’s lighting conditions‚ as ambient light can affect brightness. Adjusting the display size or distance from the screen may also improve clarity. Restarting the projector and ensuring the lens is clean can help restore image quality effectively.
7.3 Remote Control Not Working
If the remote control isn’t functioning‚ ensure batteries are installed correctly and try replacing them with new ones. Check for obstructions between the remote and projector. Point the remote directly at the sensor and test functionality. Reset the projector by unplugging and replugging it. If issues persist‚ re-pair the remote by following the manual’s instructions or contact customer support for assistance. Always ensure the remote is within range and free from interference.

Advanced Features of the AuKing Mini Projector
Explore advanced features like built-in wireless connectivity‚ smartphone compatibility‚ and outdoor projection support‚ enhancing your viewing experience with versatile and innovative functionalities.
8.1 Built-In Wireless Connectivity Options
The AuKing Mini Projector features built-in wireless connectivity‚ enabling seamless screen mirroring and content streaming from smartphones and tablets via Airplay and Miracast. This eliminates the need for cables‚ providing a clutter-free setup. Additionally‚ Wi-Fi support allows direct connection to your home network‚ making it easy to stream content from popular apps. This feature enhances portability and versatility‚ perfect for both indoor and outdoor use. Optimize your viewing experience with wireless convenience‚ ensuring effortless entertainment anywhere.
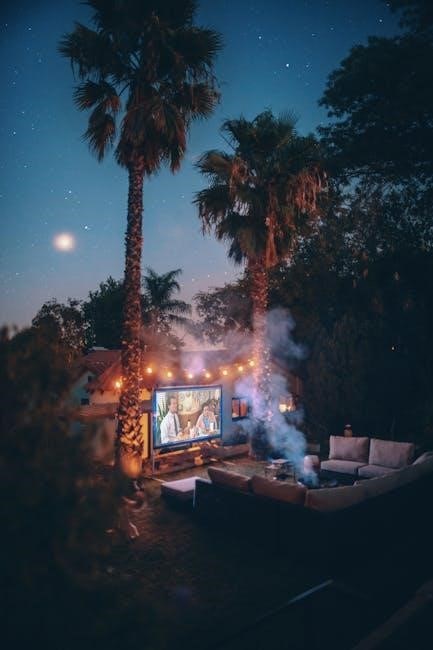
8.2 Using the Projector for Outdoor Settings
The AuKing Mini Projector is ideal for outdoor use‚ offering portability and versatility. Its compact design makes it easy to carry‚ while the long-lasting LED lamp ensures extended viewing sessions. For outdoor setups‚ ensure a smooth projection surface‚ such as a white sheet or portable screen. Optimal brightness is achieved in low-light conditions‚ making it perfect for evening gatherings. Connect your devices wirelessly or via HDMI for a seamless outdoor cinema experience. Ensure the projector is fully charged or plugged in for uninterrupted entertainment.
Safety Precautions and Maintenance
Ensure proper ventilation to prevent overheating. Avoid direct eye exposure to the projector’s light. Clean the lens regularly for optimal performance and longevity of the device.
9.1 Proper Ventilation and Cooling
Ensure the AuKing Mini Projector operates in a well-ventilated area to prevent overheating. Keep it away from flammable materials and avoid blocking the cooling vents. Maintain at least 10 inches of space around the projector for optimal airflow. Regularly clean dust from vents and grills to ensure efficient cooling. Never place the projector near direct heat sources or in confined spaces‚ as this can damage the internal components and reduce its lifespan.
9.2 Avoiding Direct Eye Exposure
Avoid looking directly at the projector’s lens‚ as prolonged exposure to the bright light can cause eye strain or discomfort. This precaution is especially important for children. If accidental exposure occurs‚ look away immediately and rest your eyes in a dimly lit environment. Never stare at the light source during operation‚ as it can potentially harm your vision over time. Always prioritize eye safety while using the projector.

FAQs and Common User Queries
This section addresses frequently asked questions and common concerns about the AuKing Mini Projector‚ offering solutions and tips for optimal usage and troubleshooting.
10.1 How to Connect the Projector to a Phone
To connect your phone to the AuKing Mini Projector‚ use an HDMI adapter for wired connections or enable wireless mirroring via Airplay or Miracast. Ensure your phone and projector are on the same network for wireless setups. For Android devices‚ download the Eshare app to stream content directly. For iOS‚ use Airplay to mirror your screen. If issues arise‚ restart both devices and check connectivity settings. This ensures seamless media sharing and an enhanced viewing experience.
10.2 Solving Connectivity Issues
If you encounter connectivity problems‚ ensure all cables are securely connected and verify that the correct input is selected on the projector. Restart both the projector and your device to reset the connection. For wireless issues‚ check that both devices are on the same network and that Wi-Fi is enabled. If using an HDMI adapter‚ ensure it is powered and compatible. Consulting the user manual or troubleshooting guide can also resolve specific connectivity errors effectively.
With proper setup and care‚ the AuKing Mini Projector delivers exceptional home theater experiences. Follow the manual for optimal performance and enjoy stunning visuals with ease always.
11.1 Final Tips for Optimal Performance
For the best experience with your AuKing Mini Projector‚ ensure a stable and smooth projection surface. Regularly clean the lens and maintain proper ventilation to prevent overheating. Adjust the focus wheel precisely for clear images and use the remote control to fine-tune settings. Connecting external devices via HDMI or wireless options enhances functionality. Troubleshoot issues promptly and refer to the manual for guidance. Proper care ensures long-lasting performance and cinematic-quality entertainment.