Welcome to the Vivitar Drone Manual! This guide provides essential information for safe and effective operation of your Vivitar drone, covering models like the Skyhawk DRC-447. Designed to help you understand features, proper usage, and troubleshooting, this manual ensures a seamless flying experience. Read carefully to maximize your drone’s potential and enjoy responsible flying.
1.1 Welcome and Overview
Welcome to the Vivitar Drone Manual! Thank you for choosing Vivitar as your trusted companion for aerial photography and exploration. This manual is designed to guide you through the safe and effective operation of your Vivitar drone, ensuring you maximize its potential while adhering to safety standards. Whether you’re a seasoned pilot or a first-time user, this comprehensive guide will walk you through every aspect of your drone, from pre-flight preparation to advanced features. The manual covers popular models such as the Vivitar Skyhawk DRC-447, DRC-333, and DRC-X1, providing tailored instructions for each. By following this manual, you’ll be well-equipped to navigate the skies confidently and responsibly. Happy flying!
1.2 Purpose of the Manual
This manual is designed to provide a comprehensive guide for operating and maintaining your Vivitar drone. Its purpose is to ensure safe, effective, and enjoyable use of your device. The manual covers essential topics such as pre-flight checks, calibration, flight operations, and troubleshooting. It also includes detailed instructions for specific models like the Vivitar Skyhawk DRC-447, DRC-333, and DRC-X1. By following this guide, you’ll gain a thorough understanding of your drone’s features, assembly, and operation. The manual is intended for both new and experienced users, offering clear instructions to help you navigate the complexities of drone ownership. Refer to this manual regularly to ensure optimal performance and compliance with safety standards.
1.3 Safety Precautions
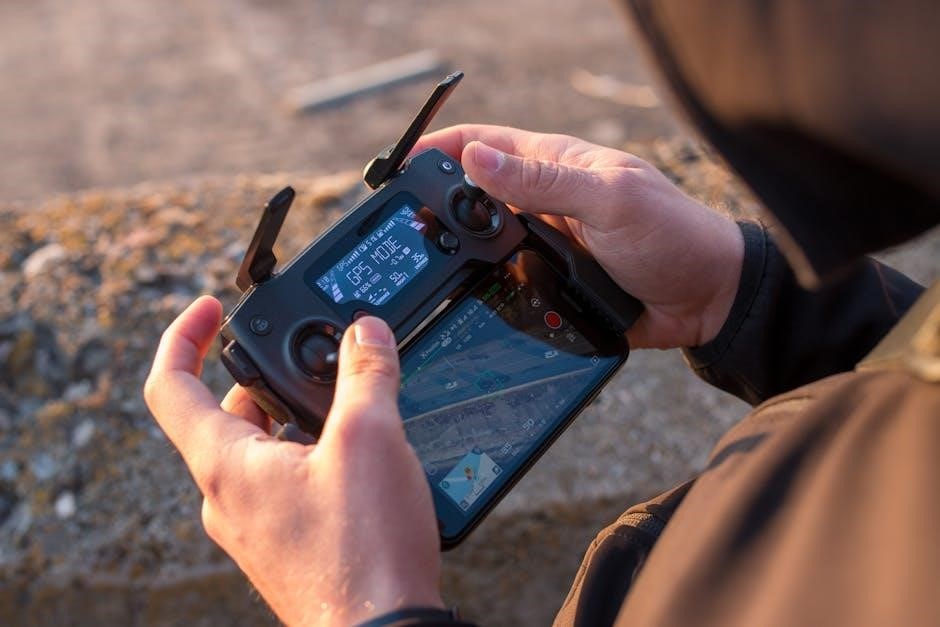
Safety is paramount when operating your Vivitar drone. Always follow these precautions to ensure a secure and enjoyable flying experience. First, fly your drone outdoors in open spaces, avoiding indoor use. Keep the drone away from water and moisture to prevent damage. Ensure the CPS Mode Switch on the remote control is in the ON position before calibration. Never attempt to fly near people, animals, or sensitive infrastructure. Familiarize yourself with local drone regulations and avoid no-fly zones. Regularly inspect the drone for damage and ensure all components are securely attached. Properly maintain the battery and avoid overcharging. By adhering to these guidelines, you can minimize risks and enjoy safe, responsible drone operation.
Pre-Flight Checklist
Ensure a safe and successful flight by following these essential steps:
- Check the camera lens for cleanliness.
- Verify the CPS Mode Switch is ON.
- Synchronize the drone and remote control properly.
- Confirm all components are securely attached.
- Ensure the drone is calibrated for outdoor use.
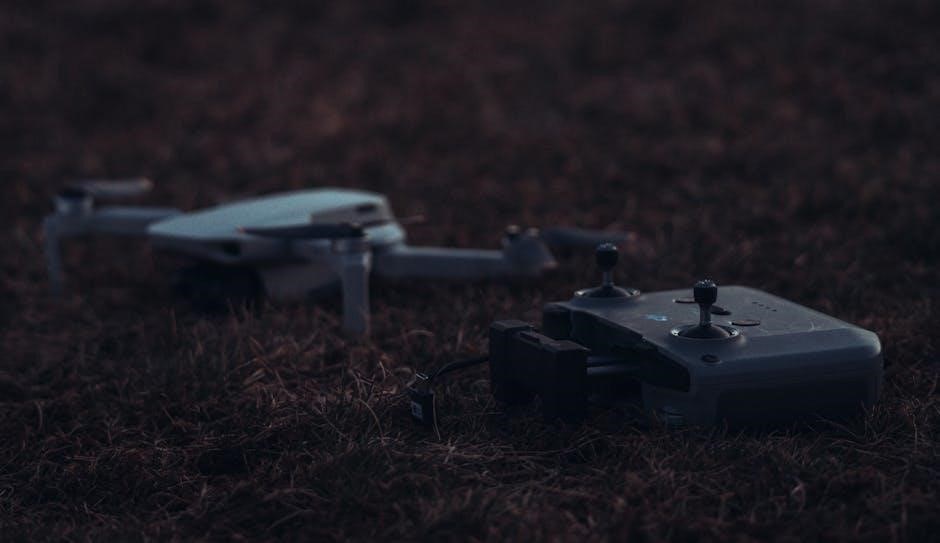
2.1 Understanding the Drone Components
Understanding your Vivitar drone’s components is crucial for safe and effective operation. Key components include the drone body, rotors, motors, GPS module, camera, and remote control. The drone body houses the flight controller and battery, while rotors and motors enable flight. The GPS module aids in navigation and stabilization. The camera captures photos and videos, with models like the Skyhawk DRC-447 featuring high-resolution capabilities. The remote control allows you to command the drone, with joysticks for movement and buttons for functions like takeoff and landing. Familiarizing yourself with these parts ensures proper assembly, maintenance, and troubleshooting. Always refer to your specific model’s manual for detailed component descriptions and functionality.
2.2 Steps for Pre-Flight Preparation

Before flying your Vivitar drone, ensure all components are ready. Start by inspecting the drone and remote control for damage. Charge the battery fully and insert the SD card if needed. Clean the camera lens to avoid blurry footage. Calibrate the GPS and compass outdoors, away from obstacles. Sync the remote control with the drone by following the manual’s instructions. Check the weather—avoid flying in strong winds or rain. Ensure the flying area is clear of obstacles and people. Finally, review local drone regulations to ensure compliance. Proper pre-flight preparation ensures a safe and enjoyable flying experience with your Vivitar drone.

Understanding Your Vivitar Drone Model
Welcome to your Vivitar drone manual! This guide covers popular models like the Skyhawk DRC-447, DRC-333, and Skyhawk DRC-X1. Each model offers unique features and capabilities, ensuring an exceptional flying experience. Refer to the specific sections for detailed information on your drone’s operation and maintenance.
3.1 Vivitar Skyhawk DRC-447
The Vivitar Skyhawk DRC-447 is a high-performance foldable drone equipped with GPS and video capabilities. Designed for outdoor use, it features a compact design and advanced navigation systems. The DRC-447 is ideal for both beginners and experienced pilots, offering stable flight and precise control. Its GPS functionality enables features like follow-me mode and waypoint navigation. The drone comes with a detailed manual that guides users through assembly, calibration, and operation. Key steps include compass calibration, GPS synchronization, and remote control setup. A video tutorial is also available for visual learners. Ensure proper pre-flight checks and adhere to safety guidelines for optimal performance. This model is a versatile choice for recreational and aerial photography needs.
3.2 Vivitar DRC-333
The Vivitar DRC-333 is a versatile and user-friendly drone designed for both recreational and aerial photography enthusiasts. It features a compact design, making it easy to transport and store. The DRC-333 is equipped with a high-quality camera and intuitive controls, allowing users to capture stunning footage with ease. The manual provides detailed instructions for assembly, calibration, and operation, ensuring a smooth learning curve for new pilots. Key features include a pre-flight checklist, troubleshooting tips, and guidance on using the Vivitar Aeroview app for enhanced functionality. The DRC-333 is ideal for outdoor flights and offers a balance of performance and affordability. Regular maintenance, such as cleaning the camera lens and updating software, is recommended to maintain optimal performance. Follow safety guidelines to ensure a safe and enjoyable flying experience.
3.3 Vivitar Skyhawk DRC-X1
The Vivitar Skyhawk DRC-X1 is a high-performance drone designed for enthusiasts seeking advanced features and reliability. It boasts a robust design, GPS capabilities, and a high-resolution camera for capturing crisp aerial footage. The DRC-X1 is foldable, making it portable and convenient for outdoor adventures. This model is equipped with a user-friendly interface and compatibility with the Vivitar Aeroview app, enabling features like follow-me mode and real-time video transmission. The manual provides detailed instructions for assembly, calibration, and operation, ensuring a seamless experience. Regular software updates and proper maintenance, such as cleaning the camera lens and checking propellers, are recommended to maintain optimal performance. The DRC-X1 is ideal for both recreational and professional use, offering a balance of power and precision.
Calibrating Your Vivitar Drone
Calibrating your Vivitar drone ensures optimal performance and accuracy. Follow the manual’s instructions for compass, GPS, and remote control synchronization. Proper calibration guarantees precise flight and safe operation.
4.1 Compass Calibration
Compass calibration is crucial for your Vivitar drone’s navigation system. Ensure the drone is outdoors, away from metal objects, and the CPS Mode Switch is ON. Power on the drone and remote, then press and hold the left stick down and right stick down simultaneously for 5 seconds until the lights flash. Move the drone in a horizontal figure-eight pattern until the lights stop flashing, indicating successful calibration. Avoid recalibrating near magnetic interference. If the drone’s compass is not calibrated properly, it may cause navigation issues during flight. Always follow the manual’s specific steps for accurate calibration to ensure safe and precise operation.
4.2 GPS Calibration
GPS calibration ensures accurate navigation and positioning for your Vivitar drone. Begin by locating an open area with clear satellite visibility, free from obstructions. Power on the drone and remote control, ensuring the CPS Mode Switch is in the ON position. Initiate GPS calibration through the Vivitar Aeroview App or by following the manual’s specific instructions. The drone will automatically search for satellites and calibrate its position. Wait until the lights on the drone stop flashing, indicating successful calibration. Proper GPS calibration is essential for stable flight, precise location tracking, and reliable return-to-home functionality. If calibration fails, restart the process or refer to troubleshooting guidelines in the manual. Always calibrate GPS before each flight for optimal performance.
4.3 Synchronizing the Remote Control
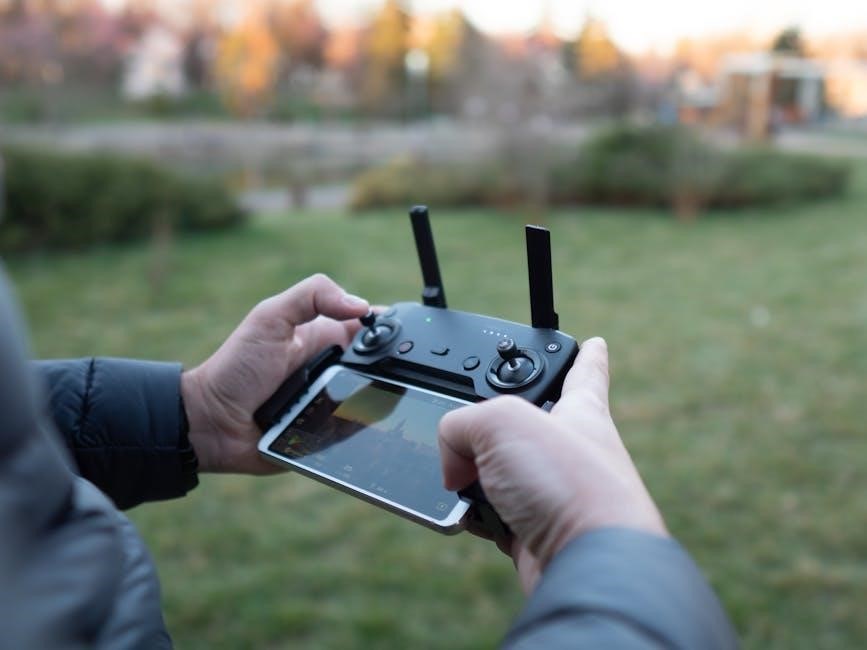
To ensure proper communication between your Vivitar drone and remote control, synchronization is essential. Begin by turning on the drone and the remote control. Locate the CPS (Custom Profile Settings) Mode Switch on the remote and move it to the ON position. The drone’s lights will begin to flash, indicating the start of the synchronization process. Press and hold the bind button on the remote until the lights stabilize, confirming successful pairing. This process ensures seamless control during flight. Always synchronize the remote control before each flight to maintain reliable connectivity and optimal performance. Proper synchronization is crucial for safe and precise drone operation.
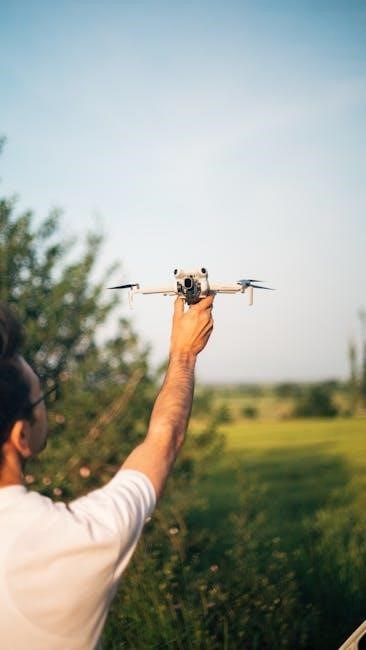
Flying Your Vivitar Drone
Flying your Vivitar drone requires careful preparation and attention to safety guidelines. Ensure proper calibration, check surroundings, and use GPS mode for stable and precise flight operations. Always follow local regulations and maintain line of sight for a safe and enjoyable experience.
5.1 Basic Flight Operations
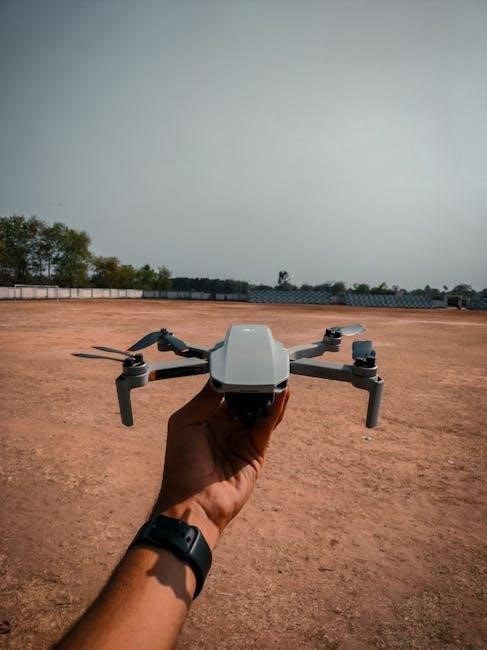
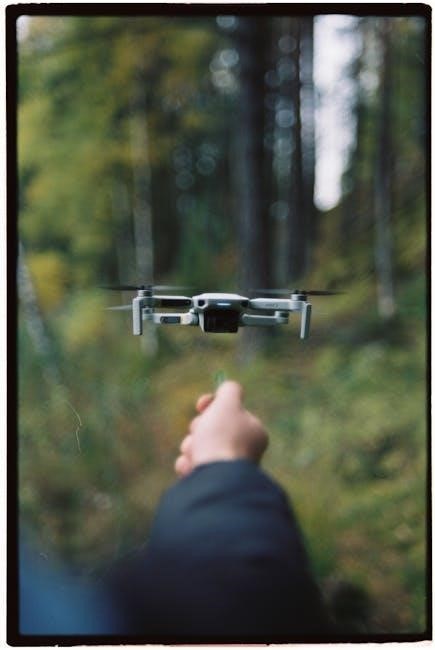
Mastering basic flight operations is crucial for a smooth experience with your Vivitar drone. Begin by ensuring the drone and remote control are properly synchronized. Locate a safe, open area for takeoff, free from obstacles. Power on the drone and remote, then wait for the system to initialize. Use the left stick to control throttle and the right stick for direction. Gradually increase the throttle to lift off, maintaining steady movements. Always keep the drone in your line of sight and avoid flying near people or restricted zones. For new pilots, start with short flights to practice control and orientation. Familiarize yourself with the drone’s responsiveness and adjust settings as needed for optimal performance.
5.2 Using GPS Mode
GPS mode enhances your Vivitar drone’s flight experience by providing precise navigation and stability. To activate GPS mode, ensure the drone is calibrated and has a clear satellite signal. Open the Vivitar Aeroview app, navigate to settings, and enable GPS. The drone will now hold its position and altitude automatically. Use GPS mode for steady footage or hands-free flying. Features like Return-to-Home and Follow-Me are accessible in this mode, allowing the drone to track your movement or return to its takeoff point. For optimal performance, fly in open areas with minimal signal interference. Always monitor the drone’s status and be prepared to switch to manual control if needed. GPS mode is ideal for capturing smooth videos and photos while maintaining control effortlessly.
5.3 Advanced Flight Features
Your Vivitar drone offers advanced flight features to elevate your aerial photography and videography. GPS mode enables precise navigation, while Follow-Me mode allows the drone to track your movement. Waypoint Navigation lets you set a flight path for autonomous missions. These features enhance stability and creativity, ensuring smooth footage capture. Use the Vivitar Aeroview app to access and customize these settings. Advanced modes are perfect for professional-grade photography and dynamic video recording. Always ensure proper calibration and a clear GPS signal before engaging these features. Explore the full potential of your Vivitar drone with these innovative tools designed to make your flying experience more enjoyable and productive.
Maintenance and Care
Regular maintenance ensures optimal performance and longevity of your Vivitar drone. Clean the camera lens, check propellers for damage, and update software regularly for enhanced functionality.
6.1 Cleaning the Drone
Regular cleaning is crucial for maintaining your Vivitar drone’s performance and longevity. Use a soft, dry cloth to wipe down the drone’s body, paying attention to crevices where dust may accumulate. For the camera lens, gently use a microfiber cloth to avoid scratches. Avoid harsh chemicals or abrasive materials, as they may damage the drone’s surface. Never submerge the drone in water or expose it to excessive moisture. After cleaning, inspect the propellers for debris and ensure they are securely attached. Regular maintenance helps prevent malfunctions and ensures optimal flight performance. Always clean your drone in a dry, stable environment to avoid accidental damage.
6.2 Battery Maintenance
Proper battery maintenance is essential for ensuring the longevity and performance of your Vivitar drone. Always use the original charger provided with your drone to avoid damage. Avoid overcharging, as this can degrade the battery’s capacity. Store the battery in a cool, dry place when not in use, and ensure it is fully charged every 3-6 months to prevent deep discharge. Inspect the battery regularly for signs of wear or damage, and replace it immediately if you notice any swelling, dents, or frayed wires. Never expose the battery to extreme temperatures or moisture. For optimal performance, update your drone’s firmware regularly, as this often includes battery management improvements. Proper care will extend the life of your drone’s battery and ensure safe, reliable flights.
6.3 Software Updates
Regular software updates are crucial for maintaining optimal performance and security of your Vivitar drone. These updates often include improvements to flight stability, GPS functionality, and battery management. To update your drone’s firmware, ensure it is fully charged and connected to the remote control. Use the Vivitar Aeroview app to check for available updates and follow the on-screen instructions to complete the process. Some models may require manual updates via a computer, so refer to the specific instructions for your drone. Always avoid interrupting the update process, as this could cause system errors. Keeping your drone’s software up to date ensures compatibility with the latest features and enhances overall flying experience.
Troubleshooting Common Issues
This section helps resolve common problems with your Vivitar drone, such as connectivity issues, calibration errors, or flight instability. Follow step-by-step solutions to restore optimal performance.
7.1 Common Drone Issues
Common issues with Vivitar drones include compass calibration errors, GPS signal loss, and remote control synchronization problems. Flight instability or erratic behavior can occur due to improper calibration or software glitches. Users may also experience issues with battery performance, such as short flight times or charging problems. Additionally, camera malfunctions, like poor video quality or failed recording, are frequently reported. To address these issues, ensure proper calibration, update software regularly, and maintain battery health. Refer to the troubleshooting section for detailed solutions to restore optimal drone performance and resolve these common problems effectively.
7.2 Remote Control Troubleshooting
Common remote control issues for Vivitar drones include loss of connection, unresponsive controls, or inconsistent commands. To troubleshoot, ensure the remote is properly synchronized with the drone and that the CPS Mode Switch is in the correct position. Check for low battery levels or interference from nearby devices. Calibrate the remote control sticks if they fail to respond accurately. Ensure the drone and remote are operated in an open area, free from physical obstructions. If issues persist, reset the remote or refer to the manual for detailed calibration steps. Regularly updating the remote control firmware can also resolve connectivity problems. Always follow the manufacturer’s guidelines for optimal performance and to avoid flight disruptions.

Vivitar Aeroview App
The Vivitar Aeroview App offers features like Follow-Me Mode, Camera, and Joystick controls for enhanced drone operation. Tutorial videos provide step-by-step guidance for optimal use.
8.1 Features of the App
The Vivitar Aeroview App is designed to enhance your drone experience with features like Follow-Me Mode, Camera controls, and Joystick functionality for precise navigation. It allows real-time video transmission, enabling you to capture stunning footage effortlessly. GPS tracking ensures your drone’s location is always visible, while customizable settings let you tailor the app to your flying style. Additional features include flight planning, altitude adjustments, and a user-friendly interface for seamless operation. The app also supports video recording, photo capture, and live streaming, making it a comprehensive tool for both recreational and professional use. These features ensure a smooth and enjoyable flying experience with your Vivitar drone.
8.2 Setting Up the App
To set up the Vivitar Aeroview App, start by downloading it from the App Store (iOS) or Google Play Store (Android). Once installed, launch the app and follow the on-screen instructions to connect it to your drone. Ensure your drone is powered on and in pairing mode. The app will guide you through linking your device via Wi-Fi or Bluetooth. After connection, enable GPS for precise navigation and location tracking. Review and agree to the terms of use, then complete any additional setup steps, such as calibrating the drone or updating firmware. Refer to the manual for specific instructions tailored to your Vivitar drone model. Proper setup ensures optimal performance and a seamless flying experience.

Legal and Safety Considerations
Adhere to local drone regulations and no-fly zones. Ensure compliance with aviation laws and safety guidelines to avoid legal issues. Always fly responsibly and respect privacy.
9.1 Drone Regulations
Drone regulations vary by region, but most require pilots to follow specific guidelines. In many areas, drones must weigh under a certain limit to avoid registration. Pilots must be at least 13 years old and complete a safety test. Flying is restricted in no-fly zones, such as near airports or national parks. Always maintain line of sight and avoid flying above 400 feet. Respect privacy laws and avoid flying over private property without permission. Check local regulations before flying, as rules can vary. Compliance ensures safe and legal operation of your Vivitar drone, protecting both you and others. Stay informed to avoid penalties.
9.2 No-Fly Zones
No-fly zones are areas where drone operation is prohibited or restricted. These include airports, national parks, military bases, government buildings, and sensitive infrastructure. Additionally, temporary no-fly zones may be established during events or emergencies. Violating these restrictions can result in legal penalties. Always check local regulations and use the Vivitar Aeroview app to identify no-fly zones before flying. Some areas may require prior authorization for drone use. Respect these restrictions to ensure safe and responsible flying. Familiarize yourself with local laws and use mapping tools to avoid restricted areas. This helps protect both you and others while ensuring compliance with aviation regulations.
Thank you for reading the Vivitar Drone Manual! This guide has provided you with essential information to safely and effectively operate your Vivitar drone. From pre-flight checks to advanced features, we’ve covered everything you need to know. Always remember to follow safety precautions, respect no-fly zones, and stay updated on regulations. Regular maintenance and proper care will extend your drone’s lifespan and performance. If you have any questions, refer back to this manual or consult the Vivitar Aeroview app for additional support. Happy flying and enjoy capturing stunning moments with your Vivitar drone!